How to fit Fibre Optic Lights to stairs
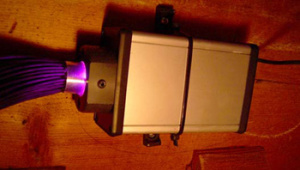
Any staircase illuminated by Fibre Optics will look amazing. The advantage of using our Universal Fibre Optic Projector is there will be no maintenance required for the projector as the LED lifetime is in excess of 40,000 hours, there are no fans, no colour wheel, no lamps to change. Our Fibre Optic Star LED Kit the projector and the optical fibres. All of the fibres will change colour at the same time, or you can set them on a static colour. Choose from over 16.7 Million colours including white, warm white, pastels, and vivid colours.. Select the colour you require from the on-screen of your iPad, iPhone or Android device using our free app. You can even connect this system to our Colour Changing LED Strip to display the same colours at the same time.
 The running costs are also very low, even if left showing white drawing a mere 3 watts it will cost less than 10p per week to run up to 220 fibres.
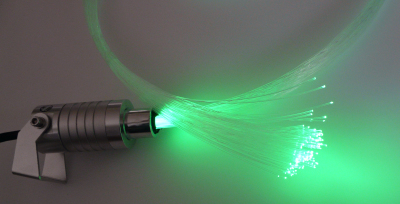
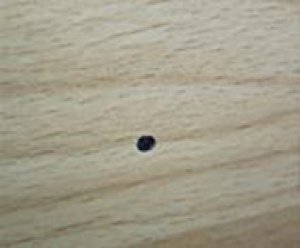
Each fibre is has a point of light, the fibre is flexible and looks very similar to fishing line, it can be taken around corners, knotted, and even cut and rejoined if required.
To illustrate the Fibre Optic strand in the picture to the left has been knotted twice, and the light is still being emitted with no discernable loss of light at the end of the fibre.
We stock various Fibre Optic harnesses, with 80 strands of fibres, others with 120, 150 and 220 Fibre strands. The harness resembles a horses tail, at the common end all of the fibres are bonded into an aluminium fitting, the aluminium fitting inserts into the end of the Fibre Optic Projector which is the colour changeable light source for the fibres. The other ends of the fibres are all free to be routed to where the light is required.
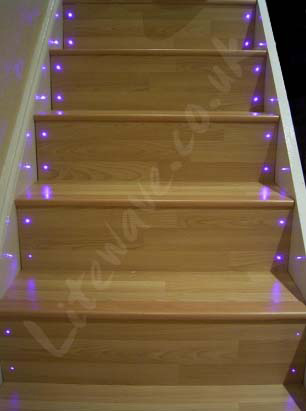
Fibre Optics can be fitted to wooden stairs, laminated stairs and carpeted stairs.
The staircase pictured has been fitted with standard laminate and the stair nosing is from a company called Pergo. The cost is comparable to using high quality carpet. The advantage of laminate is it is very long lasting, easy to keep clean, and ideal for people with asthma and dust allergies since there is nowhere for dust mites and other insects to hide!
Fibre Optics fitting guide
|
|
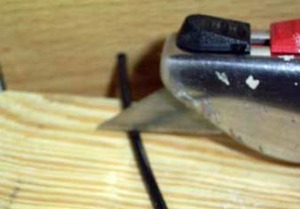
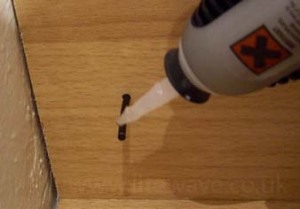
You will need access behind the staircase where you intend to fit the fibres. Decide where you will fit each fibre on the goings (horizontal plane of the steps) and risers (vertical plane of the steps). Make sure where you intend each light to be there are no joists or fixings that will prevent you from drilling a hole or feeding the fibre through. It is a good idea to count how many steps the fibres will be fitted to and then once decided multiple the number of fibres on each stair by the number of stairs, this will give you the total number of fibres required. We stock the fibre harnesses in 120 and 220 Tails, each tail will be it's point of light or "star". You can use enough fibres on each step and riser so that there are little or no remaining unused fibres, or even cut the unused fibres from the harness. The fibres can be clustered to make constellations or galaxies. Mark the spots where you want each light to be, to make this faster and more accurate you could make a template in card or plywood, drill 1mm holes in the template and use this with a pencil to mark each spot of the stair reversing the template for the left and right hand stairs. If you want a different number of holes on the goings (horiizontal step) to the risers (vertical) you may need to make a second set of holes in the template, clearly mark what the holes are for so you don’t put the pencil markings in the wrong places on the steps. Once all the markings are on the steps the holes can be drilled. If you have laminated stairs you will need a Long Series Drill Bit. Our Fibres no longer have the black protective sleeve shown in the photos this gives the best appearance as when switched off the fibres will be virtually invisible taking on the colour of the wood they are passing through. The staircase in the photos has the older black coated fibres. It is adviseable to do a test on a small piece of wood first, drill a hole and put the fibre through to see how it looks. There should be virtually no space around the fibre otherwise it will look untidy. When drilling the holes keep the drill straight and do not move the drill up or down or from side to side as this will elongate the hole which will spoil the finish. When the holes have been drilled insert the fibre from behind the stairs. Then from the front of the stairs pull the fibre through several inches so you have enough to work with. It is important to get a clean end on the fibre for maximum light ouput so you will need to carefully cut straight across the fibre with a sharp stanley knife onto a piece of soft wood such as pine, this will give a very neat edge. Then apply a thin layer of adhesive such as superglue around the outside of the fibre for a length of around 5-10mm. Push the fibre back with the wood so that it sits flush with the stair or step like in the picture. Repeat this process for each of the fibres. The CoolFusion projector should be secured in place, the harness connected to it and the grub screw tightened. Once the CoolFusions has been wired to the power via the 12v transformer the back of the stairs can be panelled in. Tools required:
|